

How to Install and Configure LuckPerms on your Minecraft Server
Why install LuckPerms?
Section titled “Why install LuckPerms?”If you’re looking for a robust and reliable way to manage permissions in Minecraft, LuckPerms is an excellent choice. It’s easy to install and configure; this guide will take you through the process. Remember that our configurations are just the basics, so feel free to customize them to suit your needs.
How to Install LuckPerms
Section titled “How to Install LuckPerms”- Go to the AleForge Panel
- Go to the
Consolepage and stop your server - Open the
Versionspage to verify you have Spigot or Paper installed - Next, open the
Plugins Installerpage - Search for
LuckPerms
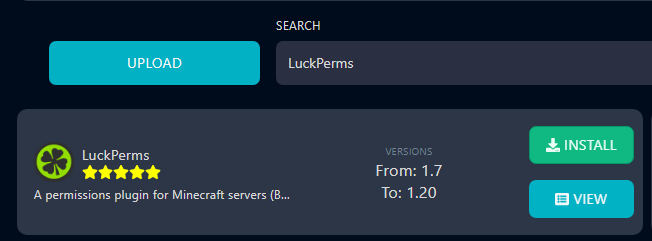
- Click
Installnext to luckPerms - Open the
Consolepage and start your server
Connect LuckPerms to MySQL
Section titled “Connect LuckPerms to MySQL”- Click
Databasesfrom the left-hand navigation menu - Select
New Database - Input a Database name in the
Database Namefield
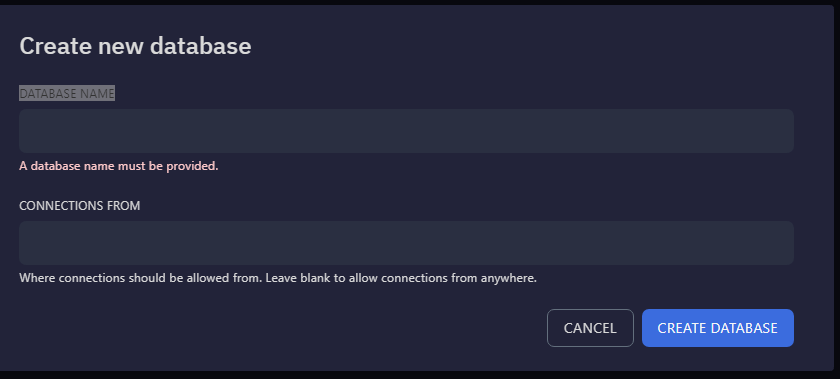
- Click
Create Database - Once the database is created, copy the following:
Endpoint
Database Name
Username
Password
Click the Eye icon next to the trashcan to show the password.

- Open the
File Manager - Navigate to
/plugins/LuckPerms - Open
config.yml - Change the following to enable MySQL support
- storage-method : MySql
- address:Endpoint from step 5
- database: Database Name from step 5
- username: Username from step 5
- Password: Password from step 5
- Click
Save Contentin the top right - Open the
Consolepage and restart your server
Configuring the Permissions in LuckPerms
Section titled “Configuring the Permissions in LuckPerms”You are required to be a server operator to change permissions
- Open Minecraft and connect to your server
- Run
/luckperms editor - Click on the link that appears in chat and select
Yes

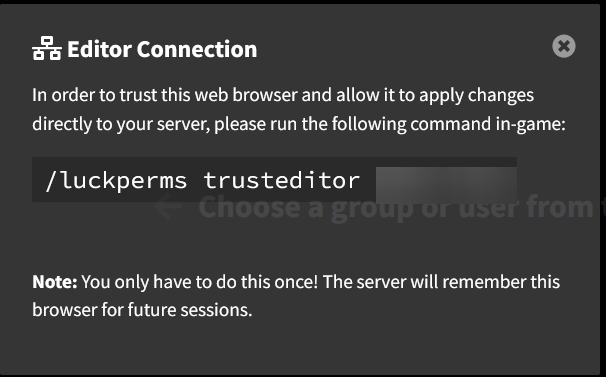
- The first time you connect to the LuckPerms editor from a browser you’ll have to copy and paste a command in game to authenticate your web browser
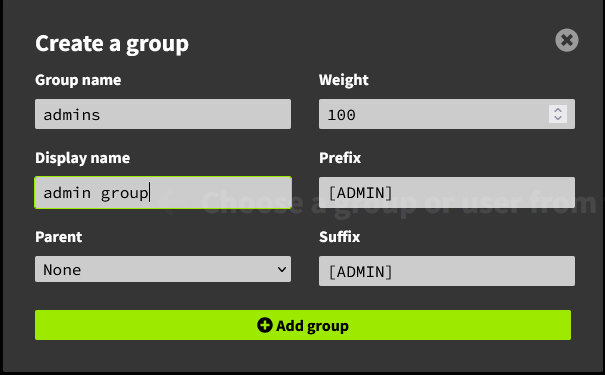
- Let’s create an admin group. Pres the plus icon next to
Groupsto begin making a group

- Here is what each of these terms mean
- Group name
- The official name of the group, this is usually used when referencing the group using any in-game commands
- Display name
- This is what will show up in the LuckPerms editor. This is not how the group will appear in game
- Parent
- Which group, if any, the group you are creating will inherit. If this is set the group will have all permissions from the “parent” group it is inheriting from
- Weight
- In the case of a player having multiple groups assigned to them, the group with a higher weight will take priority
- Prefix (Requires the plugin “Vault”)
- The tag that will be displayed before the players username in game
- Suffix (Requires the plugin “Vault”)
- The tag that will be displayed after the players username in-game
- Group name
- After you have created the Admin group, you can start adding permissions. The permissions you are able to add are dependent on what plugins you have installed. The most commonly used plugin is EssentialsX and a list of all of the permission nodes in it can be found here. In this example, we want to give our admin group access to everything so we’ll add
*under permissions.

- Next we’ll want to assign the Admin group to our user. This can be done by selecting the user from
Usersand adding the permission nodegroup.groupname

- Press Save at the top of the page. It will show a pop-up with a command inside. Copy the command
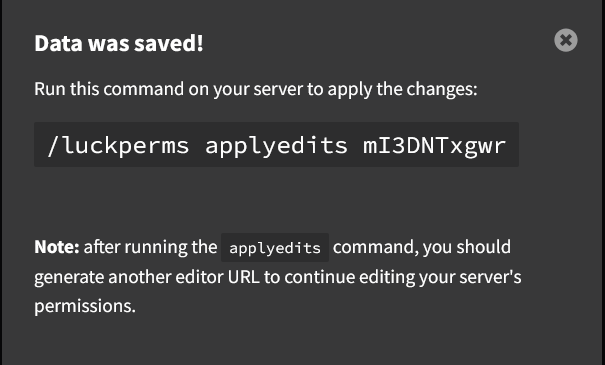
- Go back into Minecraft and run the command. This will apply your changes to the permissions