

How do I install mods on my Soulmask server?
Soulmask supports Steam Workshop, which means you can customize the game in many ways. This guide will show you how to install it through the Blacksmith’s Portal or if you’re using another host or self-hosting.
Installing Workshop Mods
Section titled “Installing Workshop Mods”Through AleForge
Section titled “Through AleForge”- First, we’ll need to make a list of all the mod IDs we want to install. The workshop mod’s ID can be found by looking at the link on the Steam Workshop URL for the mod.
 In this example, the mod id is 3401342882
- Once we have our list, we can begin installing mods.
- Go to the Blacksmith’s Portal
- Go to
Startup - Paste your mod IDs into the
Modsvariable separated by a comma
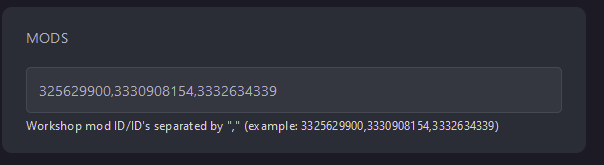
- Restart your server, and it will begin downloading and installing all of the mods to the server files.
Other Host/Self-Hosting
Section titled “Other Host/Self-Hosting”- First, we’ll need to make a list of all the mod IDs we want to install. The workshop mod’s ID can be found by looking at the Steam Workshop page URL.
In this example, the mod id is 3401342882
- Once we have our list, we can begin installing mods.
- For other hosts/self-hosting
- Edit the file that launches your server
- Add in the following line -mod””
- Between the quotation marks, add in your mod id’s separated by a comma like so
-mod"325629900,3330908154,3332634339"
- Restart your server, and it will begin downloading and installing all mods to the server files.