

How to make your Project Zomboid server private
There are a number of ways you can limit access to your Project Zomboid server. You can set up passwords, whitelists, or even configure your server to work as a perma-death server.
Enabling a password on your server
Section titled “Enabling a password on your server”- Go to the AleForge Panel
- Go to the File Manager
- Navigate to
.cache/Server/dedicated.iniThis may be named differently if you changed your save name fromStartup - Look for
Password=and change it
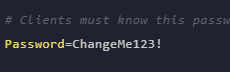
Save the file and restart your server.
Enabling a Server Whitelist
Section titled “Enabling a Server Whitelist”- Go to the AleForge Panel
- Go to the File Manager
- Navigate to
.cache/Server/dedicated.iniThis may be named differently if you changed your save name fromStartup - Look for
Open=and change it to false
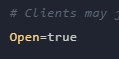
Save the file and restart your server.
You can use these console commands to manage the whitelist
| Command | Description |
|---|---|
AddUser <username> <password> |
Adds any user to the whitelist but requires their in-game account password |
AddUserToWhitelist <username> |
Adds an already connected user to the whitelist |
RemoveUserFromWhitelist <username> |
Removes a user from the whitelist |
AddAllToWHitelist |
Adds all online users to the whitelist |
Miscellaneous Options
Section titled “Miscellaneous Options”You can additionally use these options in your dedicated.ini to fine tune how you want your whitelist to work, or if the server is visible in the Steam browser.
| Setting | Values | Description |
|---|---|---|
| AutoCreateUserInWhiteList= | true/false | If true, automatically adds users to the whitelist |
| DropOffWhiteListAfterDeath= | true/false | If true, removes a player from the whitelist if their character dies |
| Public= | true/false | If true, it means that your server will be visible on Steam |
Be sure to restart your server after making any changes to the dedicated.ini