

How do I add Addons to my Bedrock Server?
Addons are Bedrock behavior packs that change how the game works. They can add new mobs, items, blocks, crafting recipes, and other gameplay features. When you install an addon on your server, every player who joins will experience those changes.
Many addons are distributed as .mcaddon or .mcpack files from sites like MCPEDL and the Minecraft Forum. Some addons also include a matching resource pack for textures and models. If yours does, install the resource pack as well using our resource pack guide.
Installing an Addon
Section titled “Installing an Addon”There are two ways to install an addon: a less technical method where you enable it in a singleplayer world and upload that world, and a more technical method where you install it directly on the server.
Installing an Addon to your world
Section titled “Installing an Addon to your world”- Download the addon to your computer. If it is a
.mcaddonor.mcpackfile, double-click it to import it into your local Bedrock edition of Minecraft. - Open Minecraft Bedrock.
- Under your world, hit the pencil icon to edit your world.
- Scroll down and select
Behavior Packs.

- Click
Available. Here you’ll see the behavior packs you can add to your world. - Activate the pack(s) you’d like to use. If the addon requires a resource pack, open
Resource Packsand activate the matching pack there as well. - Scroll back to
General. - Under File Management select
Export Worldand save your world as an.mcworldfile on your computer.
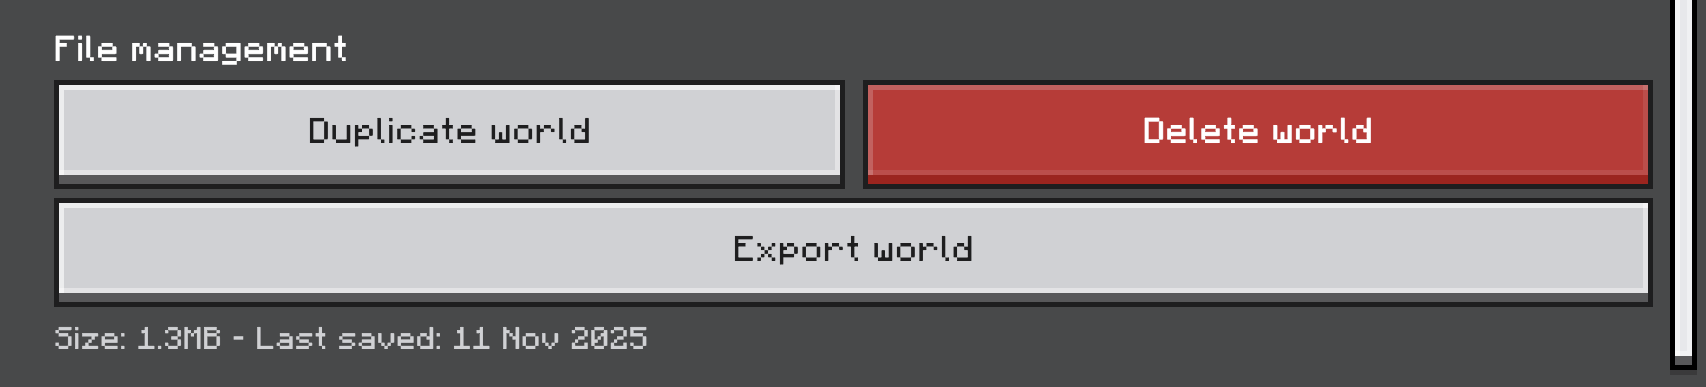
- Upload that exported world to your server (see below), then restart the server.
Uploading the world to your server
Section titled “Uploading the world to your server”- Open the Blacksmith’s Portal
- Go to
Files - Open
worlds. If you do not see aworldsfolder, create one with theCreate Directorybutton. - Inside
worlds, create a folder with theCreate Directorybutton and name it, e.g.myworld.
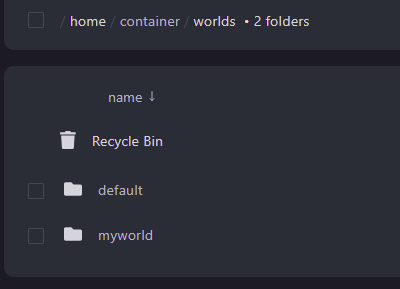
- Open your created folder.
- Upload your exported
.mcworldfile. - Right click on your uploaded file and select
Unarchive. - Restart your server. The addon will now be active on that world.
Uploading Addons directly to your server
Section titled “Uploading Addons directly to your server”- Open the Blacksmith’s Portal.
- Go to
Files. - Open
development_behavior_packs. If you don’t see it, create it with theCreate Directorybutton. - Within this folder, create a new folder named after the addon.
- On your computer, locate the
.mcaddonor.mcpackfile you downloaded and upload it to this folder. - Right click on it and select
Unarchive.
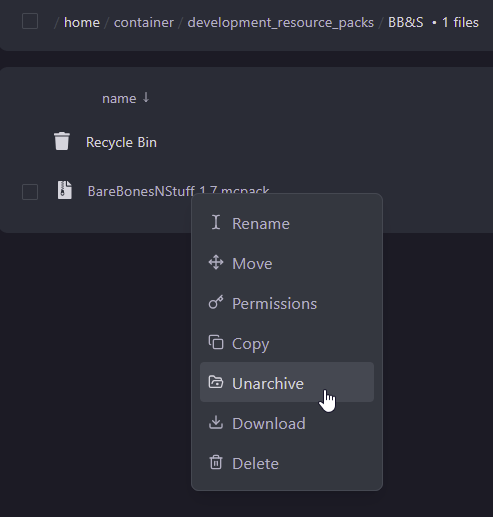
- Repeat for any additional behavior packs.
- If the addon includes a resource pack, upload it to
development_resource_packsusing the same steps. See our resource pack guide for details. - Continue below to enable the pack on your existing world.
Manually enabling Addons on an existing world
Section titled “Manually enabling Addons on an existing world”To enable addons on a world that is already on your server, upload the behavior packs first, then register them in your world folder.
- Each uploaded behavior pack has a
manifest.jsonfile inside its folder. - Open
manifest.jsonand note theUUIDandVersionkeys under theheaderobject. You will need these next.
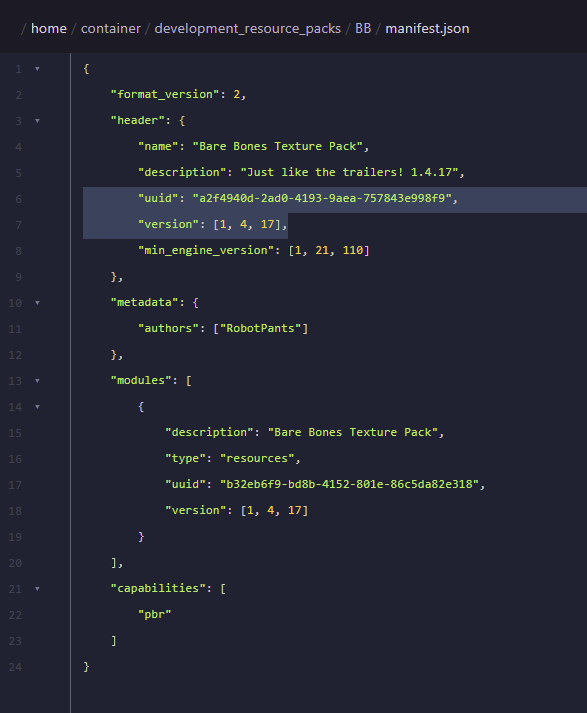
- Go to your world folder, e.g.
worlds/myworld. - Open
world_behavior_packs.json. If you don’t see one, create it with theNew Filebutton. - The file should look like this:
[ { "pack_id": "uuid pasted from behavior pack", "version": [1, 0, 0] }]- For multiple behavior packs, add a comma after each
}except the last entry. - If the addon requires a resource pack, add it to
world_resource_packs.jsonin the same world folder using the resource pack UUID and version. - Save the file and restart your server.